If you've ever finished a hard Zwift session and looked down at your bike like, "Why does it look like it just survived a tropical storm?" - you're not alone.
Indoor riding creates a special kind of sweat problem. Outdoors, sweat evaporates, wind cools you, and the bike is constantly being rinsed by airflow. Indoors, sweat has nowhere to go. It drops straight down, it runs along cables, it pools around bolts, and it finds the exact spot you didn't know could rust.
So yes - Zwifting can absolutely ruin parts of your bike over time if sweat is unmanaged.
And yes - towels can help a lot, but they can also create problems if you use the wrong towel, place it poorly, trap moisture, or ignore what sweat does behind the scenes.
What follows is how to use towels during Zwift in a way that actually protects your bike, your trainer, your floor and your sanity. It's written for real life: messy workouts, limited space, and the kind of fatigue that makes "proper cleanup" feel like an impossible task.
We'll cover:
- what sweat actually damages (and how fast it happens)
- whether towels help or harm
- the best towel setups (simple, cheap, effective)
- what you should wipe, what you shouldn't, and why
- how to protect expensive components like bars, headset, and seatpost
- the cleaning routine that takes 3 minutes, not 30
- warning signs you're slowly destroying your bike
- a "minimalist kit" that solves 90% of the problem
Let's get into it.
Why Zwift sweat is different than outdoor sweat
Sweat is always salty, but indoor sweat is more destructive because it's concentrated and persistent.
Outside:
- airflow evaporates sweat
- your body cools efficiently
- sweat is less likely to drip and pool
- rain and road spray can rinse salt away (not always good, but it's a rinse)
Inside:
- less airflow = more sweating
- sweat drips straight down for long periods
- sweat pools on top of the bike, not off to the sides
- the same salty liquid sits on metal for the entire session
If you do indoor riding regularly, you are basically running a slow corrosion experiment on your bike.
Even if you wipe it sometimes, sweat can still creep into places you don't see. And that's where damage happens.
What sweat can actually ruin on a bike (the honest list)
Sweat is mostly water, but it also contains salts and minerals that accelerate corrosion. It can damage different materials in different ways.
Bolts and fasteners
The most common casualties are:
- stem bolts
- headset spacers/bolts
- top cap bolt
- seatpost clamp bolts
- bottle cage bolts
- derailleur bolts
- cleat bolts (especially if you walk around sweaty)
If you've ever tried to adjust a bolt and it feels gritty, sticky, or "crunchy," that's often corrosion starting.
Headset and bearings
This is one of the big hidden issues.
Sweat drips from your face and arms onto:
- handlebar area
- stem
- top tube
- headset cap
From there it can creep into the headset bearings. That leads to:
- rough steering
- clicking sounds when turning
- premature bearing wear
- corrosion you won't see until it's bad
A headset is not cheap to replace if it gets properly messed up, especially on some frames.
Handlebars and bar tape
Bar tape is like a sweat sponge.
If sweat soaks the tape repeatedly:
- it stays wet longer
- salt builds up
- it can stink and degrade
- it can trap sweat against the bar surface
If you have aluminum bars, the salt trapped under tape can contribute to corrosion over time. Even carbon bars can suffer from sweat getting into clamp areas and bolt interfaces.
Seatpost and seat tube area
Sweat runs down your back, down your shorts, and drips onto:
- saddle rails
- seatpost
- seat clamp
If sweat gets into the seatpost area and stays there:
- metal-on-metal contact can seize
- carbon paste can clump and hold salt
- clamps can corrode
Seatposts that seize into frames are a nightmare.
Cables, housing, and electronic ports
Sweat can run along cables like a little river.
For mechanical shifting:
- sweat can accelerate cable corrosion
- housing ends can corrode
- shifting performance can degrade
For electronic drivetrains:
- sweat can contaminate charge ports if exposed
- it can build salt near junctions and connectors
- it can increase the chance of weird electrical issues (rare, but it happens)
Trainer area and drivetrain spray
Even though sweat mainly attacks the top/front of the bike, don't ignore the bottom half.
Sweat can drip down onto:
- bottom bracket area
- chainrings
- trainer clamps
- axle interfaces
Also, indoor riding often means:
- more consistent cadence
- more steady power
- more drivetrain friction time
So your drivetrain still needs attention, especially if you sweat heavily.
So... can towels ruin your bike?
A towel can't chemically "ruin" your bike on its own the way sweat can.
But a towel can make things worse if it:
- traps moisture against the frame
- stays wet for hours after the session
- rubs paint or carbon repeatedly at pressure points
- drapes over sensitive areas and pushes sweat into bearings
- encourages you to ignore cleanup because you assume the towel "handled it"
So the answer is:
Towels are protective when they keep sweat off the bike and dry quickly.
Towels are risky when they trap sweat on the bike and stay wet.
That's the difference.
The towel myth that causes damage
A lot of people do this:
They throw a towel over the top tube and handlebars, do the ride, then leave it there - wet - for hours or overnight.
That feels like "I protected the bike."
But what you really did was:
- create a wet salt blanket
- keep moisture pressed against the frame and bolts
- slow down evaporation
- increase the time sweat sits in contact with metal interfaces
If your towel is soaked and stays in contact with bolts, headset area, or cable housing, it can absolutely contribute to corrosion.
The towel is not the enemy. Wet time is the enemy.
The "two-zone" solution: one towel is not enough
The easiest way to stop ruining your bike is to stop trying to solve everything with one towel.
Instead, think in two zones:
Zone A: Body sweat capture
This is a towel for you.
- You wipe your face
- you wipe arms
- you wipe neck
- it absorbs sweat that would otherwise drip
Zone B: Bike protection
This is a towel (or sweat guard) that blocks sweat from landing on the bike, especially the front end.
If you use one towel for both zones, it gets soaked faster and becomes a wet blanket on your frame.
Two-zone thinking is the biggest upgrade for the least effort.
The best towel placements (and what to avoid)
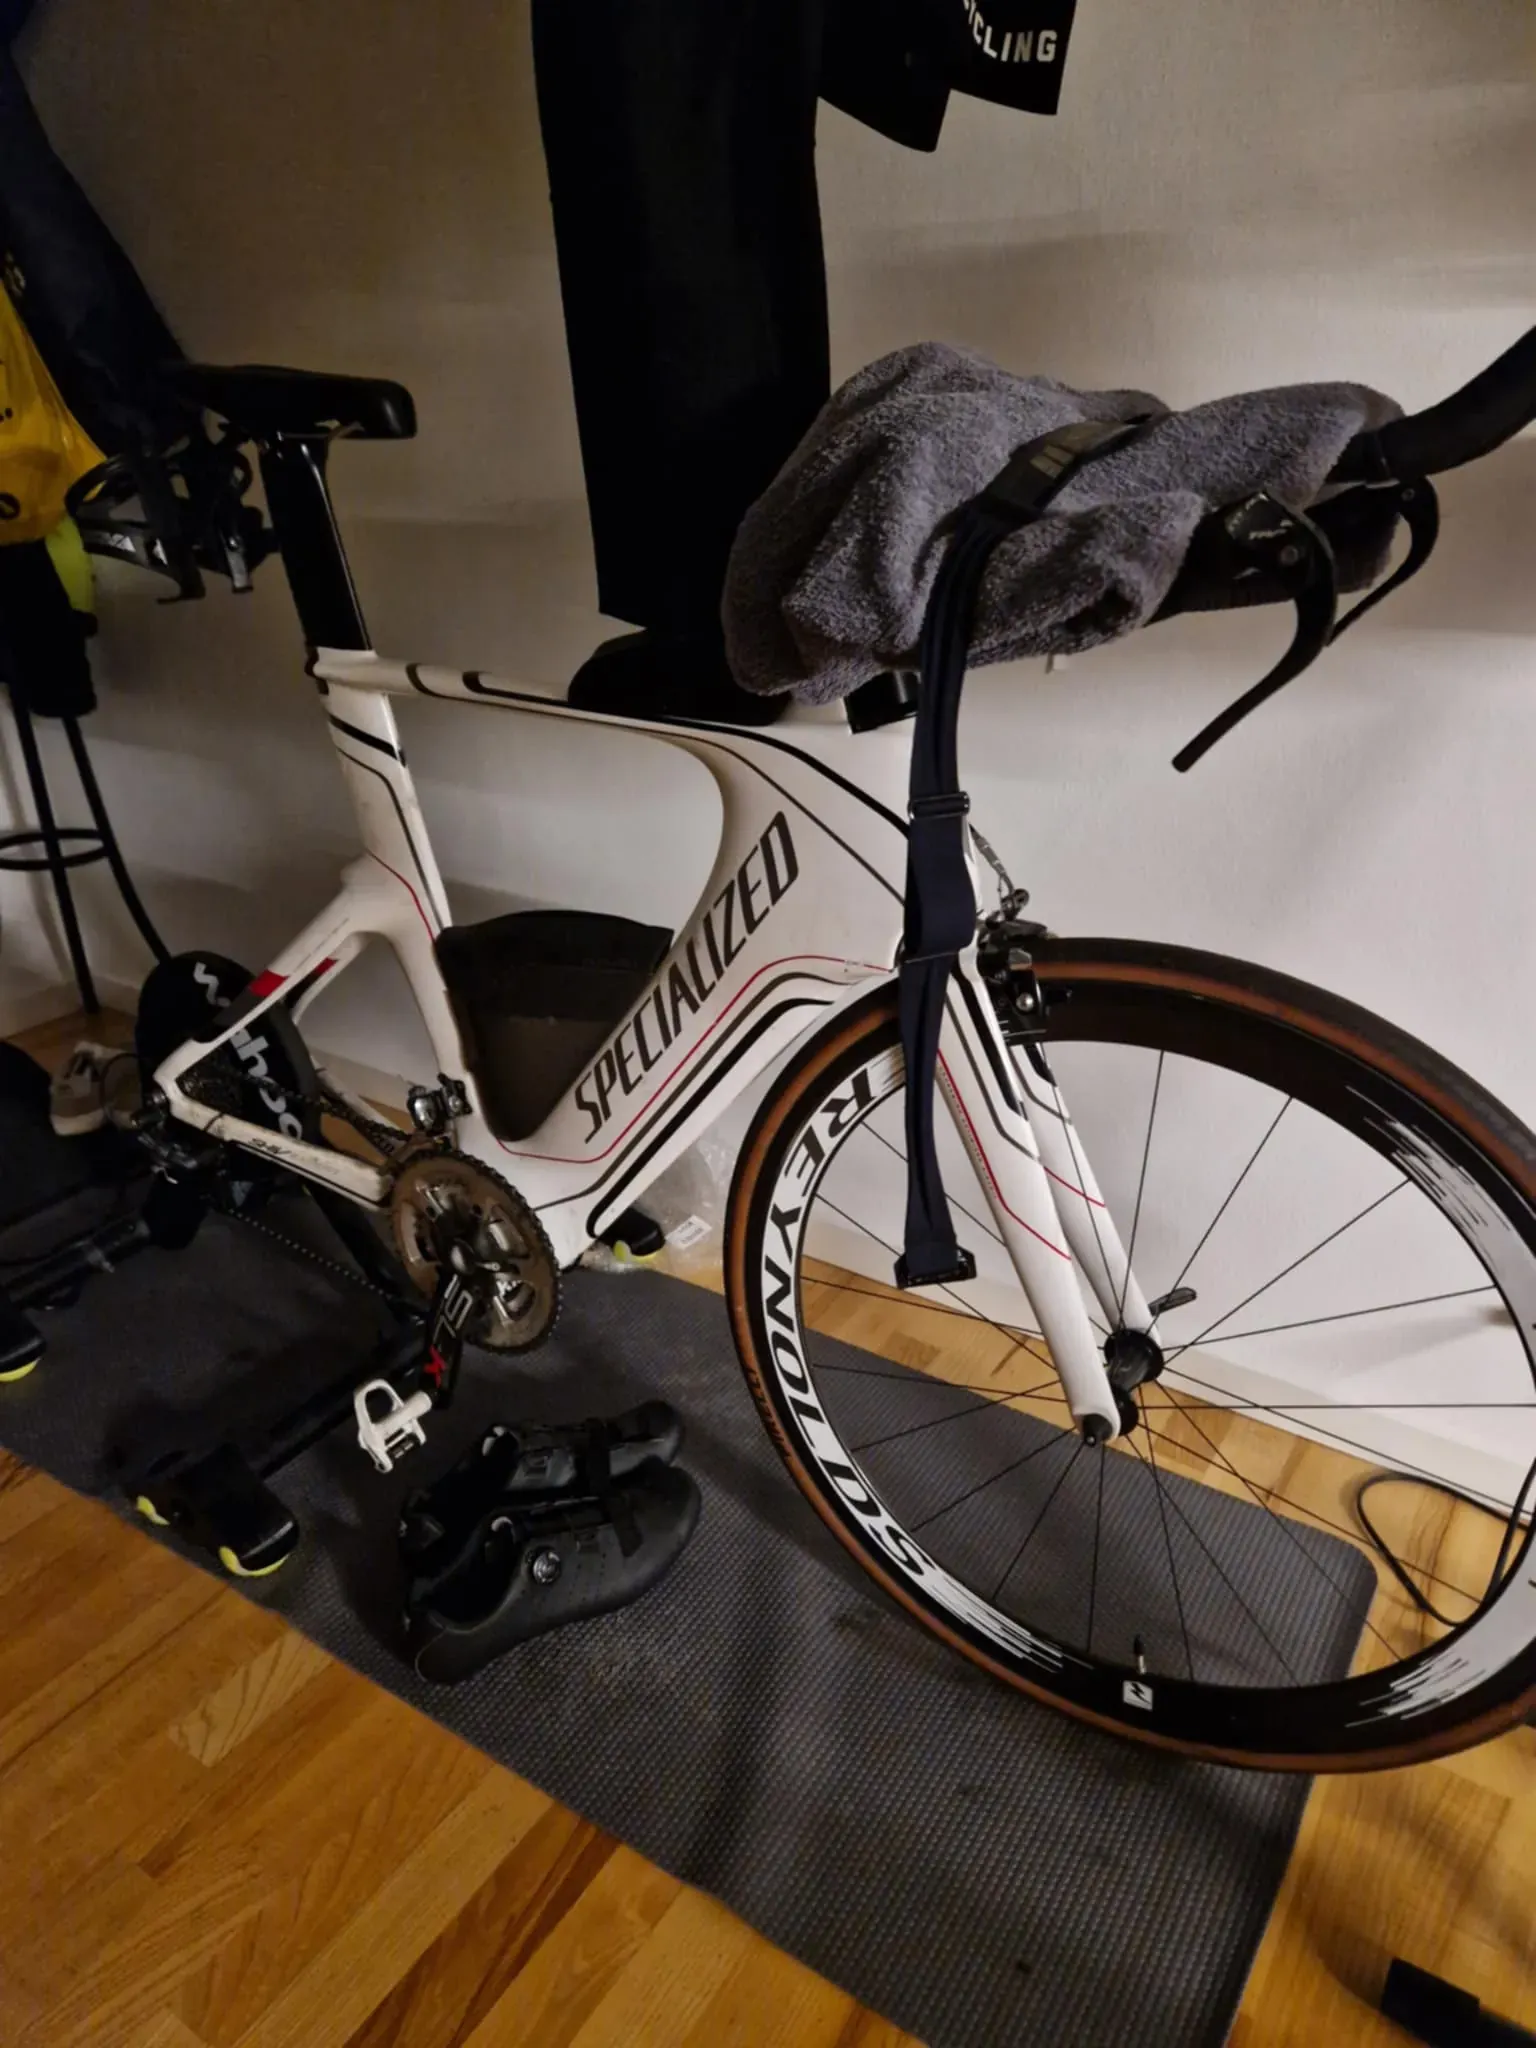
Best: "handlebar bridge" towel
This is the classic setup: towel draped across the bars and resting lightly over the top tube area.
But you must do it correctly:
- don't wrap it tight around the stem
- don't press it down into the headset
- don't let it bunch into cable housing
- keep it loose so it can breathe
Goal: catch droplets, not create a wet seal.
Best: "frame drape" only on flat surfaces
If you want to cover the top tube, do it lightly. Avoid wrapping around:
- headset
- stem bolts
- spacers
- headset cap
Those areas are where sweat sneaks into bearings.
Best: towels on the floor, not just on the bike
A floor towel or mat is underrated. It protects:
- your floor
- your trainer
- your shoes and cleats
- the lower frame area from splashback
If you only use a bike towel, sweat still ends up everywhere.
Avoid: towel stuffed into the headset zone
If a towel is wedged near the headset/top cap area, it can:
- hold sweat against the bearing seals
- direct sweat into gaps
- create constant moisture pressure
Keep the headset area as open and dry as possible.
Avoid: abrasive towel rubbing on paint
Some towels have rough edges or are not soft. Repeated rubbing (especially if the towel moves while you ride) can dull paint or scuff clear coat over time.
Use a soft towel and secure it so it doesn't slide around.
What towel type is best for Zwift?
You don't need fancy. You need the right properties.
Ideal towel traits
- absorbs well
- dries quickly
- soft (won't scuff)
- doesn't shed lint everywhere
- big enough to cover bars/top tube without bunching
Best practical choice: microfiber gym towel + regular cotton towel combo
Microfiber dries faster and absorbs well (great for wiping you)
Cotton feels better against skin and is cheap (fine for floor)
For bike draping, either can work, but microfiber often dries quicker, which is a big plus.
What to skip
- very fluffy towels that hold water forever
- towels that shed lint (lint + sweat + grease = grime)
- towels with hard stitched edges that can rub paint
The sweat guard vs towels debate (and the real answer)
There are sweat guards that stretch from the bars to the seatpost (or stem to seat). They exist for a reason.
They:
- block sweat from the headset and top tube
- are easy to remove
- often dry faster than a thick towel
- can be washed quickly
But a sweat guard is not a full solution. You still need:
- a towel for your face/arms
- a floor mat or towel
- a quick wipe-down routine
If you want the simplest setup:
- one sweat guard on the bike
- one small towel for your face
- one floor mat
That's a clean and effective trio.
The 3-minute post-Zwift routine that prevents damage
Most people fail at bike care because routines are too long.
So here's the truth: a short routine done consistently beats a perfect routine done never.
Step 1: remove wet towel immediately
Do not let it sit on the bike.
Hang it somewhere to dry or toss it in a laundry basket.
Step 2: quick wipe the "sweat line"
Use a dry cloth and wipe:
- handlebars and stem area
- top tube
- headset cap area
- front brake hood area
- seatpost clamp zone
- saddle rails
This takes about 60 seconds.
Step 3: wipe bolts that get hit most
If you can only do a few:
- stem bolts
- top cap area
- seatpost clamp bolts
Step 4: check the floor and trainer
If sweat pooled around the trainer:
- wipe it
- especially around metal parts and bolts
That's it.
You don't need to clean your drivetrain every time. You need to stop sweat from sitting on the bike.
What about leaving the bike on the trainer all the time?
Leaving the bike on the trainer is fine mechanically for most setups, but it increases the risk of "neglect drift."
When the bike lives indoors:
- you might wipe it less because it becomes furniture
- sweat salt can build gradually
- you stop noticing small corrosion
If your bike is your primary outdoor bike too, treat the trainer setup like a "sweat environment." The bike needs attention.
A good habit:
- once per week, do a slightly deeper wipe and inspect bolts
- once per month, check headset smoothness and bar tape condition
- every few months, refresh bar tape if it's soaked and gross
Warning signs your Zwift sweat is already damaging things
If you see these, don't panic - but don't ignore them.
White crusty deposits
That's dried salt.
Common spots:
- around stem bolts
- on the top tube near the stem
- headset cap area
- between headset spacers
Rust stains near bolts
Even small orange marks mean corrosion has begun.
Crunchy or sticky bolts
If bolts feel gritty when turning, salt has likely entered the threads.
Clicking when turning the bars
Could be headset bearings or compression plug area. Sweat is a common trigger indoors.
Bar tape smells awful or feels slimy
It's likely saturated with sweat.
Seatpost feels stuck
If you have a metal seatpost in a metal frame, sweat exposure increases the chance of corrosion bonding.
How to protect the truly vulnerable areas
Protecting the headset (big one)
This is where you should focus.
Best protection:
- keep towel/sweat guard from pressing into the headset zone
- wipe the headset top area after every session
- don't let sweat pool around spacers and top cap
If you sweat heavily, consider:
- a dedicated sweat guard
- a stronger fan setup (less sweat dripping)
- a small "headband" or sweat cap to reduce face drip
Protecting handlebars and tape
Simple:
- wipe hoods and tape after sessions
- let everything dry
- replace tape when it becomes permanently gross
If you want to go one level higher:
- use silicon hood covers (some people do)
- use thicker tape that doesn't get destroyed fast
Protecting bolts
A little prevention goes far:
- wipe bolts after sessions
- occasionally remove and grease bolts that repeatedly corrode (especially stem bolts and bottle cage bolts)
- do not overtighten corroded bolts - replace them
The fan issue: the thing that reduces towel dependence
If you want to sweat less onto the bike, increase cooling.
More airflow:
- reduces sweat rate
- improves comfort
- improves performance
- reduces dripping and pooling
A good fan can reduce your towel needs dramatically.
Towels are a solution to sweat already happening.
Fans reduce the sweat problem at the source.
If you can upgrade only one thing for bike protection:
upgrade cooling.
Quick Q&A that actually matters
"I use a cheap bike for Zwift. Do I still need to care?"
Yes, because:
- corroded bolts can still snap
- headset issues still happen
- you still want a safe bike
- replacing parts repeatedly costs more than basic care
"What if my bike is carbon?"
Carbon doesn't rust, but:
- metal bolts still corrode
- bearings still get damaged
- sweat can affect interfaces and clamps
- bar tape still gets destroyed
Carbon bikes are not immune.
"Is sweat worse than rain?"
In many ways, yes.
Rain is mostly water. Sweat is salty and sits in one place.
"Can sweat damage my trainer?"
Yes. Trainers have bolts, metal parts, and sometimes exposed areas where sweat can sit. Wipe them too.
The minimal Zwift towel setup that works for almost everyone
If you want the simplest "never think about it again" setup:
- one small towel for your face/arms (microfiber works great)
- one bike sweat guard or a dedicated drape towel placed loosely
- one floor mat or towel under the bike/trainer
- one quick wipe cloth nearby
The real key is the habit:
- remove wet towel immediately
- wipe sweat line in under 3 minutes
That habit prevents most damage.
The bigger point: towels don't ruin bikes, neglect does
A towel is a tool. Used well, it protects your bike. Used poorly, it hides the problem and traps moisture.
The real enemy is:
- salt
- time
- trapped moisture
- ignoring the headset and bolts
If you control those, your bike will survive years of Zwift without getting destroyed.
About this article
Written by Christian Lassen Dam, who rides Zwift himself and builds every calculator on this site. Numbers here are either measured, and then linked to where they were measured, or modelled and estimated, and then labelled as such in the text. Spotted something wrong? Tell me and it gets corrected - the editorial policy explains how.
Related Articles
Continue reading with these related articles and guides:
Zwift Lag, Rubber-Banding and Dropouts: Finding the Real Cause
Zwift sends far less data than people assume, so raw latency is almost never the culprit. The failure modes in order of how often they actually happen, a diagnostic sequence you can run tonight, and what a bad connection cannot be blamed for.
Zwift Bike and Wheel Choice: What Actually Changes Your Time
In Zwift a bike is three numbers rather than a machine, and the fastest one up the Alpe is not the fastest one on the flat. A decision table for choosing a setup, and the reason equipment is the least efficient place to look for speed.
Zwift Setup: What to Buy First, and What Can Wait
Ranked by how much difference each purchase actually makes, which puts the fan a long way above the bike. Trainers, screens, sensors and cooling, plus three complete builds at different budgets and what each one gives up.
Time of Day and Your Zwift Power: Finding Your Own Peak
Your power is not the same at 6 AM as at 6 PM, but nobody can tell you how large your own swing is. What actually moves across the day, why it moves, and a six-session protocol that measures the effect on you rather than on a study population.
Run your own numbers
Every calculator on this site runs in your browser and publishes the equation behind it: